The Rainbow Wedding

Sinclair & Moore Hanna and Bret Rainbow Wedding  1
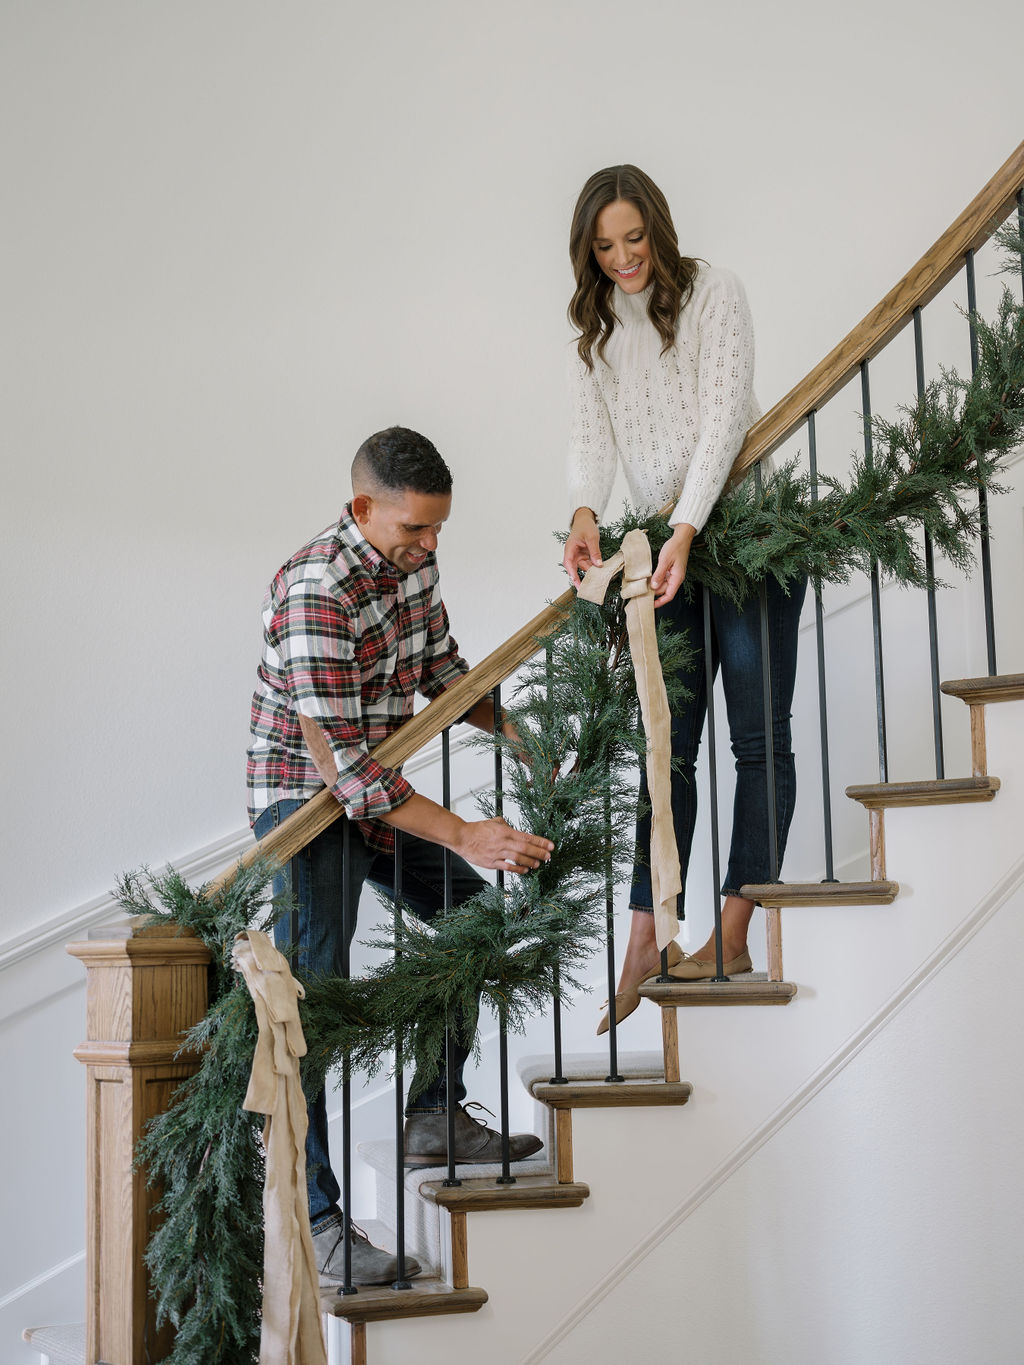
I’ve waited a long time to share the photos of this wedding that was featured in Martha Stewart Weddings.

Anyone who is familiar with my work knows that I love a neutral color palette.  Taupe… grey… champagne… blush… maybe touches of navy here and there.  Neutral colors are my favorite and definitely where I feel most comfortable designing.

Then I met the wonderful Ritt family.  They came in and colored my world with their bright personalities, love for people, passion for life and their request for a rainbow wedding.

I’m not going to lie… when I first heard the words rainbow and wedding, I wondered to myself how I was going to pull it off. They wanted it to be classy and sophisticated, yet fun and bright.  I remember googling “rainbow wedding”  and I was horrified with what I saw and it left myself wondering what had I gotten myself in to.  I was so far from my neutral color comfort zone and thoroughly confused as to how to pull it off.

I think that is what I love the most about this wedding.  I was pushed out of my comfort zone, and challenged to think bigger, better and brighter,  and the result was a wedding out of my normal box.  I learned so much from the mother of the bride, Laurie, throughout this process and not only came out a stronger and more diverse designer, but I think a better person too. Laurie reminded me why I started my business in the first place as she encouraged me to keep dreaming and perfecting good ideas until they became even better.  She pressed for me to give a particular reason why I did or did not like something in particular,  encouraged my talents, believed in my vision and in the end trusted me to just do my thing uninhibited.

I never thought I would do a rainbow wedding, but I am so glad that I did.  I couldn’t be more proud of the outcome and I am excited to finally share these photos from Belathee with you.

Make sure to also pick up a copy of the spring issue of Martha Stewart Weddings to see the 10 page feature of this affair.

Sinclair & Moore Hanna and Bret Rainbow Wedding  2 Sinclair & Moore Hanna and Bret Rainbow Wedding  3 Sinclair & Moore Hanna and Bret Rainbow Wedding  4 Sinclair & Moore Hanna and Bret Rainbow Wedding  5 Sinclair & Moore Hanna and Bret Rainbow Wedding  6 Sinclair & Moore Hanna and Bret Rainbow Wedding  7 Sinclair & Moore Hanna and Bret Rainbow Wedding  8 Sinclair & Moore Hanna and Bret Rainbow Wedding  9 Sinclair & Moore Hanna and Bret Rainbow Wedding  10 Sinclair & Moore Hanna and Bret Rainbow Wedding  11 Sinclair & Moore Hanna and Bret Rainbow Wedding  12 Sinclair & Moore Hanna and Bret Rainbow Wedding  13 Sinclair & Moore Hanna and Bret Rainbow Wedding  14 Sinclair & Moore Hanna and Bret Rainbow Wedding  15 Sinclair & Moore Hanna and Bret Rainbow Wedding  16 Sinclair & Moore Hanna and Bret Rainbow Wedding  17 Sinclair & Moore Hanna and Bret Rainbow Wedding  18 Sinclair & Moore Hanna and Bret Rainbow Wedding  19 Sinclair & Moore Hanna and Bret Rainbow Wedding  20 Sinclair & Moore Hanna and Bret Rainbow Wedding  21 Sinclair & Moore Hanna and Bret Rainbow Wedding  22 Sinclair & Moore Hanna and Bret Rainbow Wedding  23 Sinclair & Moore Hanna and Bret Rainbow Wedding  24 Sinclair & Moore Hanna and Bret Rainbow Wedding  25 Sinclair & Moore Hanna and Bret Rainbow Wedding  26 Sinclair & Moore Hanna and Bret Rainbow Wedding  27 Sinclair & Moore Hanna and Bret Rainbow Wedding  28 Sinclair & Moore Hanna and Bret Rainbow Wedding  29 Sinclair & Moore Hanna and Bret Rainbow Wedding  30 Sinclair & Moore Hanna and Bret Rainbow Wedding  31 Sinclair & Moore Hanna and Bret Rainbow Wedding  32 Sinclair & Moore Hanna and Bret Rainbow Wedding  33 Sinclair & Moore Hanna and Bret Rainbow Wedding  34 Sinclair & Moore Hanna and Bret Rainbow Wedding  35 Sinclair & Moore Hanna and Bret Rainbow Wedding  36 Sinclair & Moore Hanna and Bret Rainbow Wedding  37 Sinclair & Moore Hanna and Bret Rainbow Wedding  38 Sinclair & Moore Hanna and Bret Rainbow Wedding  39 Sinclair & Moore Hanna and Bret Rainbow Wedding  40 Sinclair & Moore Hanna and Bret Rainbow Wedding  41 Sinclair & Moore Hanna and Bret Rainbow Wedding  42 Sinclair & Moore Hanna and Bret Rainbow Wedding  43 Sinclair & Moore Hanna and Bret Rainbow Wedding  44 Sinclair & Moore Hanna and Bret Rainbow Wedding  45 Sinclair & Moore Hanna and Bret Rainbow Wedding  46 Sinclair & Moore Hanna and Bret Rainbow Wedding  47 Sinclair & Moore Hanna and Bret Rainbow Wedding  48 Sinclair & Moore Hanna and Bret Rainbow Wedding  49 Sinclair & Moore Hanna and Bret Rainbow Wedding  50 Sinclair & Moore Hanna and Bret Rainbow Wedding  51 Sinclair & Moore Hanna and Bret Rainbow Wedding  52 Sinclair & Moore Hanna and Bret Rainbow Wedding  53 Sinclair & Moore Hanna and Bret Rainbow Wedding  54 Sinclair & Moore Hanna and Bret Rainbow Wedding  55 Sinclair & Moore Hanna and Bret Rainbow Wedding  56 Sinclair & Moore Hanna and Bret Rainbow Wedding  57 Sinclair & Moore Hanna and Bret Rainbow Wedding  58 Sinclair & Moore Hanna and Bret Rainbow Wedding  59 Sinclair & Moore Hanna and Bret Rainbow Wedding  60

The Ranch Studios perfect captured this wedding and made the whole day feel like a dream.  Make sure to check out the vide below.

I also have to give my wife and business partner, Jamie, a huge shout out.  Sometimes credit is only given to the visual design of an event and people just talk about how beautiful it was.  Even more difficult than pulling together a design, is pulling together and managing about 50 vendors who all have specific needs and requests. From determining timelines to figuring out how much lighting, power, and space was needed to making sure nearly 200 plus people were picked up and shuttled to the wedding….  Jamie handled every detail of this event and managed to pull off a seamlessly smooth affair with grace and ease.  She read through and responded to literally thousands of e-mails for this wedding and hours and hours of phone conversations to make sure everything was in place.  She is truly the foundation of this wedding and the really hero in my book.  This would not have been a smooth wedding had her skill set and discerning eye not been overlooking every component of the day.  She makes our partnership strong.

And the other key vendors:

wedding dress: Vera Wang

hair and makeup: Erin Skipley

custom striped linens: Choice Linens

mini cakes and macarons: The Sweet Side

stationery: la Happy 

rentals: ABC Rentals

Ceremony Venue: Union Station

Reception Venue: The Four Seasons 

How to make Pistachio Macarons

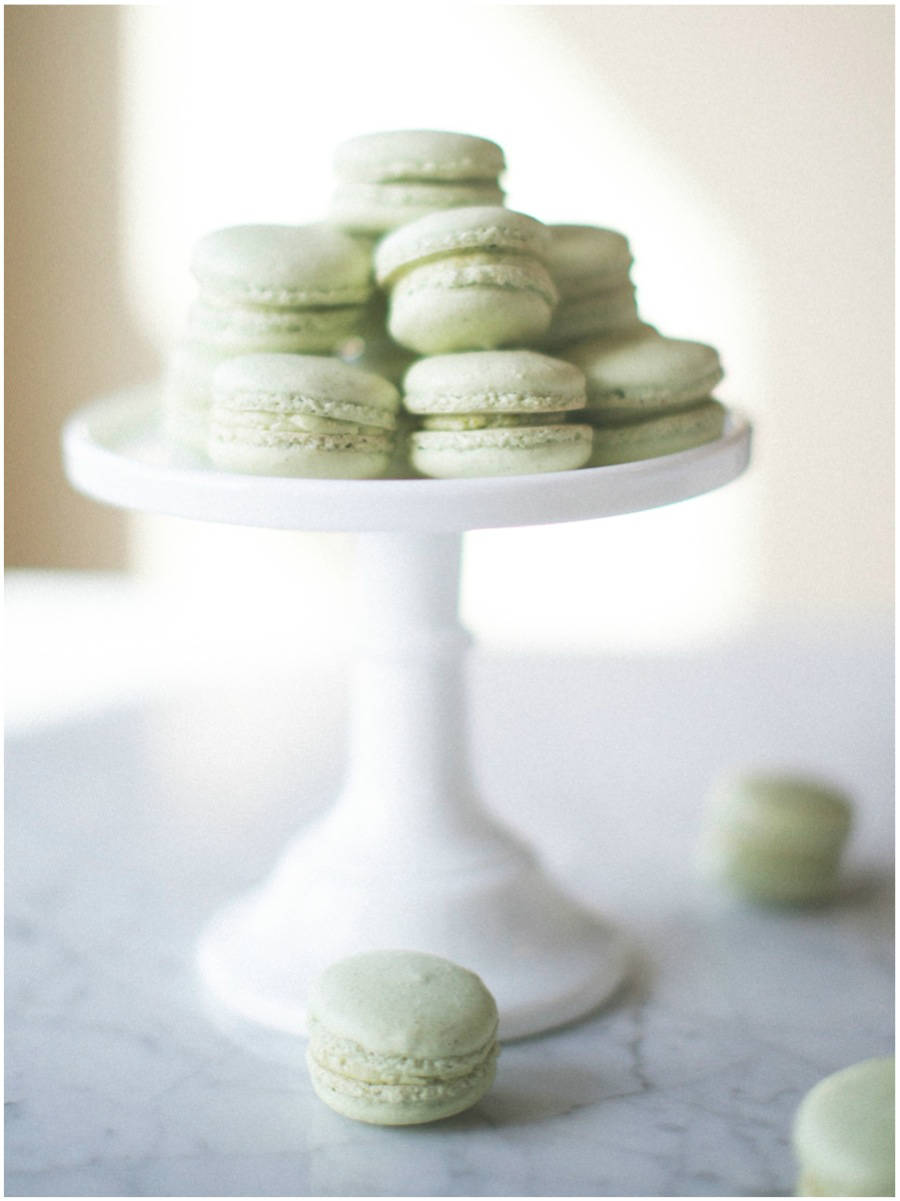
I remember the first time I made macarons. They were for Jamie’s birthday party the year we were engaged. I spent hours working on them, and I think I only ended up with about ten macarons that somewhat resembled the confections I had seen the month before in London’s Laduree. All of the other macaron shells I made did not turn out. I had envisioned stacks and stacks of beautiful macarons, so you can imagine how disappointed I was to have less than a dozen treats for her party. I set out to make them again and again. Sometimes they cracked in the oven, other times they became hollow shells that just fell apart. I have had them all flow together and lose their shape. Other times they just stuck to the pan. The whole thing made me want to scream. It felt like I was having more frustration with macaron baking than success, but I am also pretty stubborn and determined. I was determined to create a better and clearer recipe.

Sinclair & Moore macaron 1 Sinclair & Moore macaron 2

I started by reading just about every macaron cookbook, blog post and recipe that I could find. It seemed like one recipe just contradicted the next one. Some recipes call for large amounts of sugar, and others barely any sugar at all. Some recipes said to let them rest overnight before baking and other recipes said to let them rest for 10 minutes. Most recipes seemed to be very vague with the instructions as if everyone was supposed to already know what they were doing. It can all be so confusing. Through trial and error, I have combined a lot of techniques, suggestions and tricks and consolidated them below to make the recipe for what I think is the perfect macaron: delicately crusty on the outside but soft and chewy on the inside and perfectly filled with a flavored buttercream.

I’m not going to lie. This recipe is not quick and easy. The steps are all pretty simple, but I somehow still seem to dirty every dish in my kitchen. All I can say is that in the end it is so rewarding to have these little treats that you can say you made from scratch. Before you begin, read through this entire blog post and the entire recipe. Getting a firm grasp of the big picture will help you through the process.

Sinclair & Moore macaron 3

You may not find this in any other recipes, but you really should start your macaron process two or three days before you make them by separating your egg whites from the yolks and letting the whites rest at room temperature. Aging your egg whites will allow the moisture to evaporate from the egg. Less moisture means your macaron shells will be less likely to crack while baking. This is a very important step. Simply separate the whites into a bowl and cover them with plastic wrap and then let them sit on the counter at room temperature for the next couple of days. You will not get sick from this, but you will be more likely to have beautiful looking macarons. ( I was skeptical about this too… I didn’t think it would really matter so I ignored this concept.  All of my macaron shells kept cracking during the baking process until I finally aged my egg whites. Don’t skip or ignore this step!) 

Sinclair & Moore macaron 4

Use a food processor to grind your pistachios into a fine powder.  The finer you grind them, the smoother your macaron shell will be. Make sure to grind a bit more than you will need, because you will use the extra when you make the pistachio buttercream filling.

Sinclair & Moore macaron 5 Sinclair & Moore macaron 6

The almond flour you select will make a big difference as well. I have not had success with the almond flour from Trader Joe’s. It is less expensive, but it is not very fine and my shells have always turned out kind of grainy looking. Macaron baking is an investment in time, so make the investment into good supplies so all of your effort is not in vain. I have found that Bob’s Red Mill Almond Flour is the best variety to use. I even prefer this to grinding my own almonds because it alleviates the moisture that freshly ground almond flour createsYou can find Bob’s Red Mill Almond Flour at most grocery store in the baking aisle near the specialty and gluten free flours.

Sinclair & Moore macaron 7 Sinclair & Moore macaron 8

Sifting. I hate sifting. I learned the importance of sifting from my mother-in-law Gail. We made macarons together after she had returned from Paris where she had taken a macaron class. She had me sift the almond flour over and over. When I thought I was done, she told me to sift it again. Then again. Sifting feels like a chore. It can be time consuming, but it eliminates chunks from your almond flour and ground pistachios. It is an important step that leads to smoother macaron shells. The more you sift, the smoother your shells will be.

Sinclair & Moore macaron 9 Sinclair & Moore macaron 10

This next picture shows the chunks that I removed from the almond and pistachio mixture through sifting.  If I had not sifted, these chunks of nuts would be incorporated into my shell batter.  Like I said, sifting feels like a tedious chore, but it is so worth it to have a smooth shell in the end.

Sinclair & Moore macaron 11

After you sift the pistachio and almond flour together, combine it with the powdered sugar in a food processor and process for about 30 seconds.  This mixes the nut mixture and powdered sugar together, while simultaneously making it a finer powder.

Sinclair & Moore macaron 12

But not fine enough that you don’t have to sift it again. It’s a chore, but sifting the powdered sugar and nut mixture one last time will be worth the effort and ensure a smooth macaron shell.

Sinclair & Moore macaron 13

Follow the recipe carefully regarding whipping time for egg whites. You do not want to over-whip your whites. I have made this mistake far too many times, and my egg whites have become too stiff to use. You want your egg whites to be   sturdy, yet still soft and fairly fluffy. They call this ‘medium peaks’. The whipping times I have included in the recipe will get you the right consistency of egg whites. Don’t be tempted to keep whipping.

Sinclair & Moore macaron 14 Sinclair & Moore macaron 15 Sinclair & Moore macaron 16 Sinclair & Moore macaron 17

After you add the last amount of sugar to the egg whites, and before you start the final round of whipping, add a few drops of green food coloring to the mix. Many recipes will tell you to add this in a later step, but I have found that adding the color to the egg whites in this step helps to eliminate over-mixing of your shell batter at a later stage.

Only add a few drops of color to the egg whites. I prefer to use paste food coloring from Wilton. (I used a mixture of moss green and kelly green to achieve my color). I use paste food coloring rather than the liquid kind you find at grocery stores, because it does not add as much moisture and liquid back into your egg whites. Remember you have been aging your egg whites to eliminate the moisture that will help you avoid cracked shells. Don’t add the moisture back in with food coloring. You can find paste food coloring at most craft supply stores.

Sinclair & Moore macaron 18

This shows the ‘medium peaks’ you are trying to achieve with your egg whites. Still soft and cloud like, but it can hold its shape nicely.

Sinclair & Moore macaron 19

Combining the nut and powders sugar mixture to the egg whites can be a tricky step. Under-mixing results in a batter that is too firm and the macarons will have peaks. Over-mixing will result in a batter that is too thin and will not hold its shape when you pipe the shells. It is better to under-mix than to over-mix.  The more you make these, the better feel you will get for the perfect consistency. You might not get it right the first time. I sure didn’t. I still have to be really careful, as I have a tendency to be over thorough and want to make sure everything is mixed really well. You definitely want your batter to be thoroughly mixed, but work quickly and stop when everything is just incorporated.

Sinclair & Moore macaron 20 Sinclair & Moore macaron 21 Sinclair & Moore macaron 22

The recipe calls for an extra 1/2 of an egg white that was not included in the egg whites you whipped with your electric mixer. Whip this 1/2 of an egg white by hand just until frothy and then add it to the shell batter. This loosens the batter and is your final step before piping your shells.

Sinclair & Moore macaron 23 Sinclair & Moore macaron 24 Sinclair & Moore macaron 25

Filling your pastry bag can be a messy task. I have the advantage of growing up learning from my mother who was a cake decorator. If you haven’t used a pastry bag before, it can be tricky the first time, and you will likely make a mess.  (I still make a mess. Messes are ok. They can be cleaned up.)

I would start by using a 16″ disposable decorating bag. I like disposable bags because I can throw them out and not have to wash them. Cut off just enough of the tip of the bag so that when you drop a round decorating tip (size 8 or 10) into the bag just the end of the tip sticks out of the bag. Fold the wide end of the bag over your hand, forming a cuff and then carefully scoop your macaron shell batter into the bag, twist the end to close up the bag and you are ready to start piping shells. (Pictures are worths a thousand words, so follow the images that correspond- they may be more helpful than my written description!)

Decorating bags and tips can also be found at most craft stores.

Sinclair & Moore macaron 26

This may be cheating, but I like to have a pattern of circles the size I want my macarons to turn out. I created a template on the computer forming circles that were about 1 1/2 inches in size, and about 1 inch apart from each other.  If your macarons are closer together than this they could spread together when you pipe the shells. Also, too many macarons on one baking tray creates too much humidity in the oven during the baking process and your shells are more likely to crack.

Once you have your template printed out cover with parchment paper and your tray is ready to be piped. I would advise doing this to about three or four baking sheets before you even start making your macaron batter.

Sinclair & Moore macaron 27

Pipe your shells so they are just inside each of the circles on your template. Apply even pressure to your bag as you squeeze. If your macarons form little tips on each shell it is ok. You can gently tap your baking sheet on the counter, and your those little tips should dissolve into the shell.

Sinclair & Moore macaron 28 Sinclair & Moore macaron 29 Sinclair & Moore macaron 30

Once all of your shells have been piped, let your macarons just sit and rest for at least an hour. Don’t be impatient and skip this step. During the baking process, macaron shells form little feet (the frilly little ledge on the bottom of the shell)  These feet are part of the charm and character of a macaron. If you do not let your shells rest for at least an hour, your shells will not get these feet.

Many recipes say to only let them rest 15 minutes or 30 minutes. I have found more success with letting them rest at least an hour. During this resting phase I have the opportunity to clean the kitchen, or even make the buttercream filling.

Sinclair & Moore macaron 31

Keep track of your macaron shells in the oven. Near the end of the baking time, open the oven and insert a wood spoon between the oven and the door so that the door can be propped open. This lets the steam escape, which will help your macarons have a better chance of not cracking.

Your macarons are done baking when the shell is crisp and the frilly foot at the bottom does not jiggle or wobble when you lightly touch the macaron.

Sinclair & Moore macaron 32

When your macarons are done baking, let them cool completely before trying to peel them off of the baking sheet.

Sinclair & Moore macaron 33

The pistachio buttercream is relatively simple to make. Did you know that true buttercream has eggs in it? (I didn’t until recently!) After you beat the eggs and sugar together and add the ground pistachios, you will cook the combination over medium heat. Make sure to stir constantly or you will burn the mixture. (I burned this twice before being successful. It happens to a lot of us so don’t feel bad if you have to start over!)  You will want to cook the batter until it becomes a thick consistency. Pour the batter into a shallow dish. Cover with plastic wrap and let it chill in the refrigerator.

Sinclair & Moore macaron 34

I never really bought into the hype about European butter. (I thought it was a scam to spend more money.) I was wrong. It makes such a difference. I still don’t use it for everything, but I definitely think it is worth using for buttercream icing. You will want to work with cold European butter, that you cut into small squares and then whip with an electric mixer.

Sinclair & Moore macaron 36 Sinclair & Moore macaron 37

When your egg, sugar and pistachio mixture has chilled in the refrigerator long enough to solidify, add it to the whipped butter, and continue to whip until your buttercream is fluffy.

Sinclair & Moore macaron 38 Sinclair & Moore macaron 39

Fit another pastry bag with a round tip- size 5 worked well for me. Fill with your buttercream and start squeezing small dabs of buttercream on half of your shells. Sandwich the macaron together with another shell and your macaron is complete.

Sinclair & Moore macaron 40 Sinclair & Moore macaron 41

You can certainly enjoy your macarons right away, or you can store in an airtight container in the refrigerator overnight. There is a some kind of special reaction that takes place overnight and the flavors blend together resulting in a better tasting macaron. If you allow your macarons to rest overnight, take them out of the refrigerator and allow them to return to room temperature before serving them.

Sinclair & Moore macaron 42 Sinclair & Moore macaron 43

If you decide to try and make these, don’t be discouraged if they don’t turn out perfectly the first time. It takes practice and patience. I don’t make them often. I usually opt to purchase them at my favorite bakery near our house.  Although purchasing them saves me time (and usually money too)  there is something really rewarding about creating them for yourself. The recipe might seem difficult. It’s not as hard as it seems at first glance. Take your time, be patient, read through everything several times before starting, and be ok with macarons that don’t look perfect the first time. They will still taste amazing!

Sinclair & Moore macaron 44

photography: Matthew Land Studios 

recipe design and calligraphy:  La Happy

Sinclair & Moore Macaron recipe 1 Sinclair and Moore Macaron Recipe 2

Hosting Easter Brunch

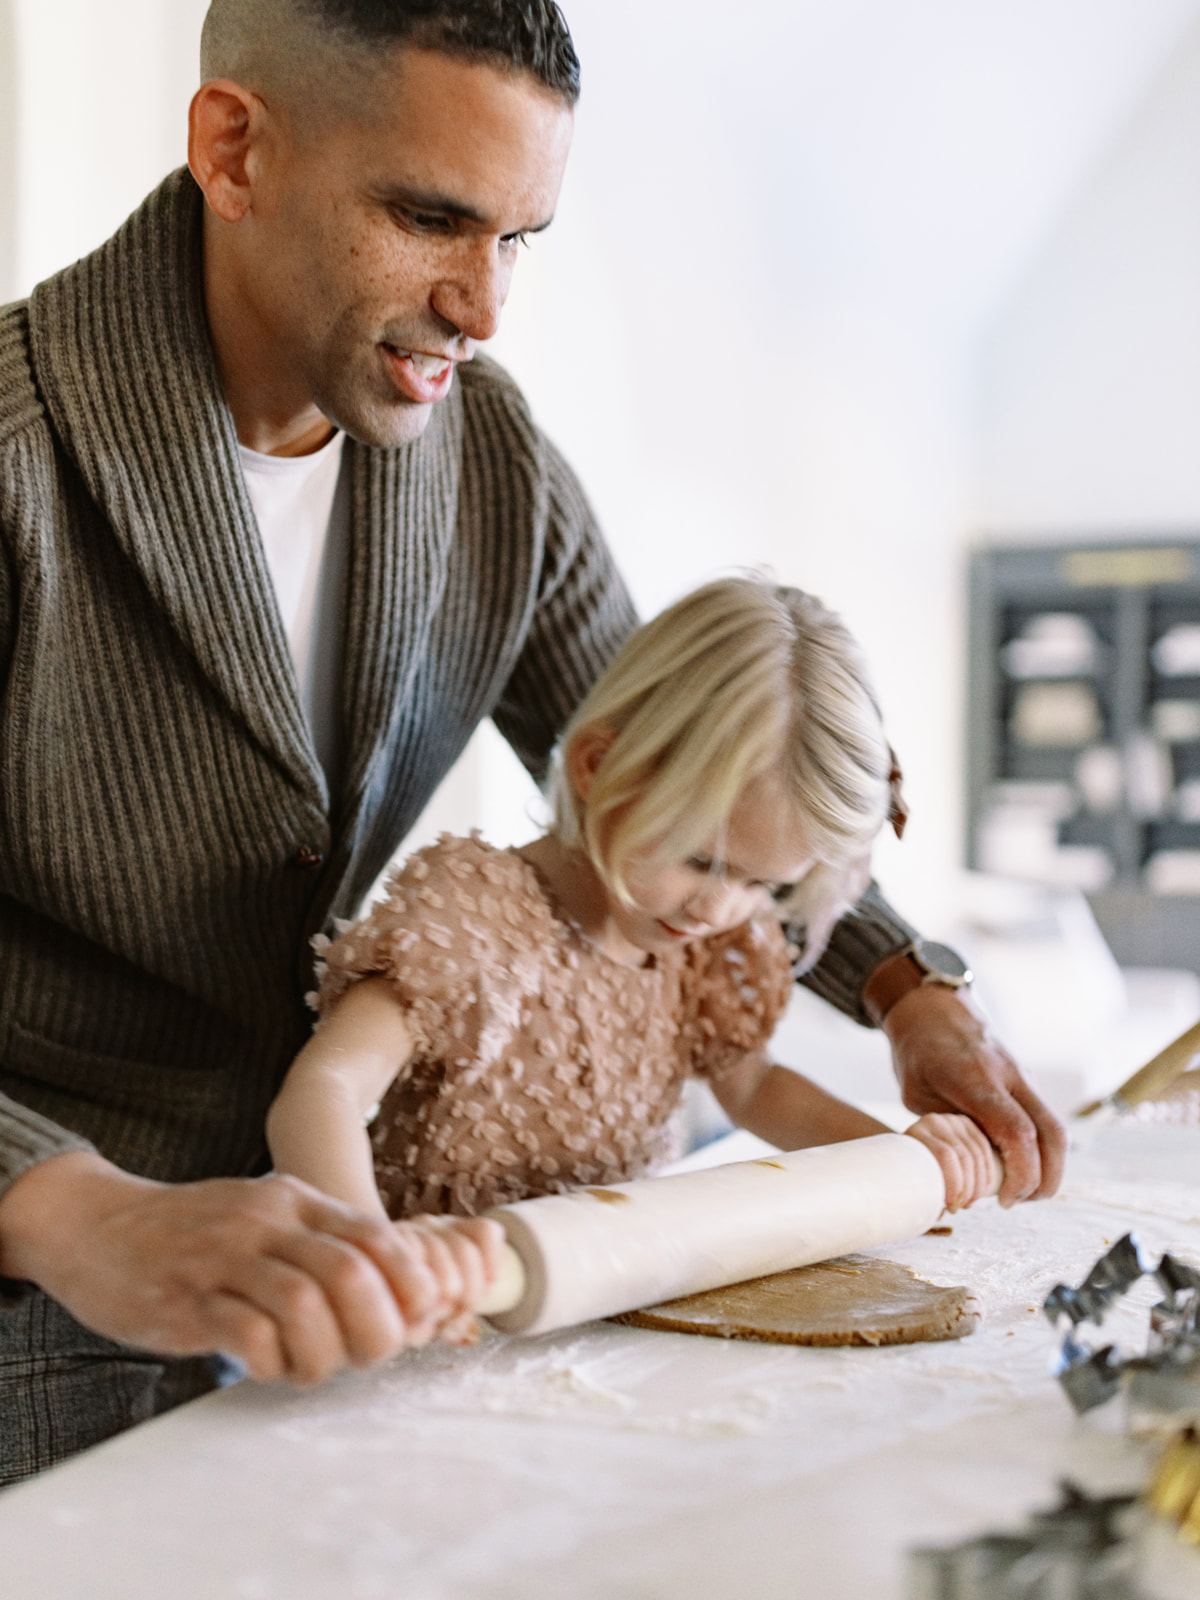
I have always loved planing parties and hosting friends and family at my table.  It started for me as a child when my mother would let me help her decorate the table for each holiday dinner (I’m sure I mostly got in the way, but my mother never let on if I was!)  In middle school I saved up my lunch money for an entire year and threw a surprise party for my parents twenty-fifth anniversary (I was quite proud of this overly teal infused party complete with crepe paper bells, a  tiered wedding cake and napkins imprinted with their names.)  In high school I planned prom (I was completely out of control with this and probably planned the most expensive prom ever- I bet 17 years later my old high school is still paying off the bills I created with this prom.)  In college I spent time organizing dinner parties for my friends instead of studying (I might have chosen to buy beautiful dishes, linens and wine glasses instead of the required text books and reading materials I was supposed to be using my money for.)

I guess it is just part of who I am…  gathering a group of people, creating a beautiful setting and having the opportunity to serve the people I love. There is something special that happens when people can leave their cares and worries at the door, and just simply gather around a table and break bread together. I love it. This is why I started our company and chose my line of work.  It just comes naturally for me.

Sinclair & Moore brunch 1

But what if it doesn’t come naturally for you?  The idea of hosting an Easter brunch might seem daunting and scary to you.  It can be easy to get lost in the details and not really even know where to start.  Cooking a meal alone might feel like a small mountain to climb, let alone trying to make a beautiful table.  You might look at the photos from our brunch and feel like you could never replicate something similar.  Looking at the big picture may feel overwhelming and you might be wondering where to even begin.

Our goal with this post is to help you know where to start and really dissect what we created.  Hopefully by breaking it down piece by piece, you’ll realize this is totally something you can accomplish.

Sinclair & Moore brunch 2

I definitely get more excited and inspired to decorate the table than I do about creating the meal, so lets start with that. decorations create an ambience and set the tone for your meal. It elevates the meal from something ordinary, and makes it feel special. This in turn makes your guests feel special- which is the whole point of hosting in the first place.

Start by thinking of what inspires you personally.  For me, I wanted our table to be inspired by spring. When I think of spring, the first words that come to mind are fresh, light, playful and fun. I wanted our brunch to reflect that mood and evoke the feeling of happiness. I ran in that direction for all of my choices.

Sinclair & Moore brunch 3Sinclair & Moore brunch 4

I started by borrowing the lucite flatware from my friend Brandy. I had seen her post a picture using this flatware on Instagram, loved it and asked to borrow it for the brunch. She graciously said yes! (Don’t be afraid to ask friends to borrow items for your brunch- people are usually flattered to loan things, and it saves you some money while sourcing all of the different elements to make your table feel special).  I love the classic design of the flatware while still retaining a whimsical and carefree style- perfect for the mood I wanted to create. I built the rest of the décor from there.

Sinclair & Moore brunch 5 Sinclair & Moore brunch 6 Sinclair & Moore brunch 7 Sinclair & Moore brunch 8

I chose vases with a fun dotted pattern in addition to glasses that had the same lighthearted feel of the silverware. I filled them with spring blooms that I bought from our local grocery store. I didn’t want the flower centerpieces to feel fussy, so I didn’t really arrange anything at all- just cut the stems shorter, and dropped them into their vases. This kept it simple and very quick to put together. It also means that anyone can replicate this.

Sinclair & Moore brunch 9 Sinclair & Moore brunch 10

I knew I wanted to use white napkins for a fresh look, but didn’t want to purchase expensive table linens. So I shopped at the fabric store and found inexpensive white fabric with the same dotted pattern as the vases, and used it to make a simple runner and napkins just by cutting squares and a long rectangle. I didn’t finish the edges or do any sewing; I literally just cut and ripped the fabric into the sizes I needed. I loved the raw unfinished edge of the pieces that I made. The little bit of fraying adds character to the table.

Sinclair & Moore brunch 11 Sinclair & Moore brunch 12 Sinclair & Moore brunch 13 Sinclair & Moore brunch 14 Sinclair & Moore brunch 15 Sinclair & Moore brunch 16 Sinclair & Moore brunch 17

I often add something edible to my centerpieces, both when we host at home and at the weddings we create. Macarons feel playful, and the pistachio color is perfect for spring. These little treats are beautiful as decor and are easy for your guests to grab and eat. It also helps to keep the conversation going after the meal is over, because people will continue to snack on the decor.

Sinclair & Moore brunch 18 Sinclair & Moore brunch 19

To add to the feeling of fun and playfulness, I chose mismatched glasses and stemware for each guest’s place setting. Using different patterns helps the table feel less formal and keeps it from becoming fussy.

Sinclair & Moore brunch 20 Sinclair & Moore brunch 21 Sinclair & Moore brunch 22 Sinclair & Moore brunch 23

These pistachio macarons are tasty to eat and pretty to look at. Although they can be tricky and time consuming to make, The results are so rewarding. I will be sharing the recipe I used for these macarons along with step by step guidance. Macarons can be made a couple days before your brunch, so all you have to do the morning of the brunch is stack and serve.

Sinclair & Moore brunch 24 Sinclair & Moore brunch 25 Sinclair & Moore brunch 26

We wanted to add some color to our brunch buffet, so Jamie created a simple citrus salad. She sliced up different varieties and sizes of oranges, tangerines and grapefruit. She then cut off the peels to form hexagon and octagon shapes, and finished by stacking them up on a serving tray.

Sinclair & Moore brunch 27 Sinclair & Moore brunch 28 Sinclair & Moore brunch 29

We also pulled in the citrus colors from the salad with our juice bar. Now… you can choose to get fancy and squeeze your own fruit and make fresh juice…  but we don’t really have time for that. Store bought juice tastes great, and looks beautiful when served in fun bottles. I don’t have the graphic design skills to create fun tags to label the juice bottles, so I cut up chunks of the coordinating fruit to indicate what our guests were pouring for themselves. Although I love fancy tags with fun calligraphy, these little identifying fruit cups added charm and interest to our juice bar.

Sinclair & Moore brunch 30

One of the things I love the most about spring is all of the blooming branches. The little buds are a simple reminder that spring has arrived. Putting a few branches into a vase adds height, fills the corner of a room and makes a big statement. The best part is how quick, easy and affordable it is.

Sinclair & Moore brunch 32

I had the vision of creating a mini bakery on the vintage buffet in our home. (I love sweets) I thought this would be a fun way to indulge our guests. (ok… you got me… I just wanted to indulge myself!) But seriously…who doesn’t love a huge spread of sweet treats and the ability to select as much of anything you want? I covered these baked goods with glass domes to create the look and feel of a true bakery.

Sinclair & Moore brunch 34 Sinclair & Moore brunch 33sinclair and moore brunch 50

We’ll be sharing the recipe later this week for these soft and chewy cinnamon rolls we created. What I love about cinnamon rolls is that you do all of the hard work the night before your brunch, and then just let the dough rise overnight in the fridge. Then all you have to do the morning of your brunch is pop them in the oven. The smell of freshly baked rolls and hot cinnamon will fill your entire house and greet your guests when they arrive. (Honestly what I really great about this is that it gives me time to clean up! I make a huge mess when I am in the kitchen and doing this the night before leaves me the time to clean up so I don’t look like a hot mess when my guests arrive)

Sinclair & Moore brunch 36

I used to think if someone was coming over that I would be “cheating” if I didn’t bake everything from scratch. The problem was, I would be so exhausted by the time my guests arrived, that I would not enjoy my company (which defeats the purpose of hosting). It’s ok to go to the local doughnut shop or French bakery or even your grocery store and fill in your buffet with store bought items. This will save you time, money, kitchen clean-up and your sanity. The best part is, you will have saved up all of the energy you would have used on endless baking, giving you more energy to enjoy your own party. No one will think you have cheated. Your guests would prefer to have you mentally present, rather than exhausted from baking too much. (I’ve learned this lesson the hard way- and I’m still  figuring this one out!)

Sinclair & Moore brunch 37sinclair and moore brunch 51 Sinclair & Moore brunch 38

As your guests arrive, pop the champagne and open up the juice bar for mimosas while you finish putting out the last of the food. (Have a towel ready in case you have a surprise like Jamie did)

Sinclair & Moore brunch 39 Sinclair & Moore brunch 40 Sinclair & Moore brunch 41

Our menu was simple: savory quiche, assorted fruit, a simple spring green salad tossed with fresh strawberries and a berry vinaigrette, and the bakery display of croissants with jam, cinnamon rolls, doughnuts and macarons. It might sound like a lot of food to prepare, but it was really quite simple when you break down the individual components (especially when you let go of your need to personally make and bake everything yourself). And remember, most of this can be done ahead of time so you aren’t rushing or stressing when your guests arrive. Pick a few key things you want to make, and then purchase everything else or you could even choose to ask your guests bring a dish to share.

Sinclair & Moore brunch 42 Sinclair & Moore brunch 43

These savory quiches were filled with caramelized onions, goat cheese, roasted red peppers, bacon and diced artichoke hearts. (so so good.) Jamie made them the day before and then all we had to do the morning of our brunch was heat them up to an enjoyable temperature. This alleviated the need to get up early and start cooking and baking at the crack of dawn. We’ll also be sharing our quiche recipe later this week with a tutorial to help with your success.

Sinclair & Moore brunch 45 Sinclair & Moore brunch 46 Sinclair & Moore brunch 47 Sinclair & Moore brunch 48 Sinclair & Moore brunch 49

People think that Jamie and I must be amazing cooks. (umm… yeah… no…)   The truth is, we actually don’t really know much about cooking at all. It’s true that we do love to bake cookies, pies and cakes, but we haven’t really ever transferred those skills over to learning how to cook dinner.  I think this is why we love the idea of brunch.  It’s a meal that is relatively simple to put together, we can use our baking skills to create it, and as I mentioned above, most items can be prepared ahead of time so we can also be fully present and enjoy our guests once they arrive.

Sinclair & Moore brunch 52Sinclair & Moore brunch 53

Whether you are celebrating Easter or just welcoming the beginning of Spring and warmer month, there is nothing better than gathering with your friends and family over a meal filled with sweet and savory treats.  Spring is the perfect season to host a brunch, and hopefully this post gives you the confidence to invite some people over.

Sinclair & Moore brunch 54 Sinclair & Moore brunch 55

Just remember to always check your perspective and priorities.  The best part about brunch wasn’t the food, the flowers or even the macarons (although those little pistachio treats are really quite tasty!)  What I’ll remember most about this morning we spent with friends was the laughter we shared and the friendships that were deepened. That’s the true purpose behind doing what we do. It’s not about impressing people. It’s about creating community, spreading love, serving people and giving them an experience where they feel welcomed and loved. Whether you brunch over homemade confections or you source the entire meal from Costco- it doesn’t matter as long as you don’t lose the perspective and purpose behind what hosting is really all about- delighting your guests.

Sinclair & Moore brunch 56

photos: Matthew Land Studios 

video: Cabfare Productions